A bloated root Elastic Block Store (EBS) volume on your Amazon Web Services (AWS) EC2 instance can lead to unnecessary costs. While AWS doesn’t offer a direct “shrink” button, a well-planned procedure involving a helper instance and disk cloning tools can effectively and safely reduce the size of your root volume. This article provides a detailed, step-by-step guide, empowering you to optimize your cloud spending.
The Challenge: No Direct Path to a Smaller Root Volume
Amazon EBS volumes are designed for easy expansion, but decreasing their size is a more involved process. This is primarily to prevent accidental data loss. To safely downsize a root volume, we will create a new, smaller volume and migrate the entire operating system and data from the original, oversized volume.
The Strategy: A Helper Instance and Disk Cloning
Our approach will leverage a temporary “helper” EC2 instance. This instance will act as a workbench where we can safely manipulate the EBS volumes without affecting the original EC2 instance until the final step. We will use a third-party disk management tool, DiskGenius, on a Windows helper instance to perform clone from the larger source disk to the new, smaller disk.
Important Considerations Before You Begin:
- Backup is Non-Negotiable: Before attempting any of the following steps, create a snapshot of your target EC2 instance’s root EBS volume. This is your safety net and allows you to restore the original state if anything goes wrong.
- Used Space vs. Provisioned Space: The used space on your source EBS volume must be less than the intended size of your new, smaller EBS volume. For example, you cannot clone 80 GB of data onto a 60 GB drive.
- Downtime is Required: This process involves detaching the root volume, which will necessitate stopping your target EC2 instance. Plan for a maintenance window.
- Region and Availability Zone: All resources (EC2 instances, EBS volumes) must be in the same AWS Region and Availability Zone.
Prepare Your Target EC2 Instance
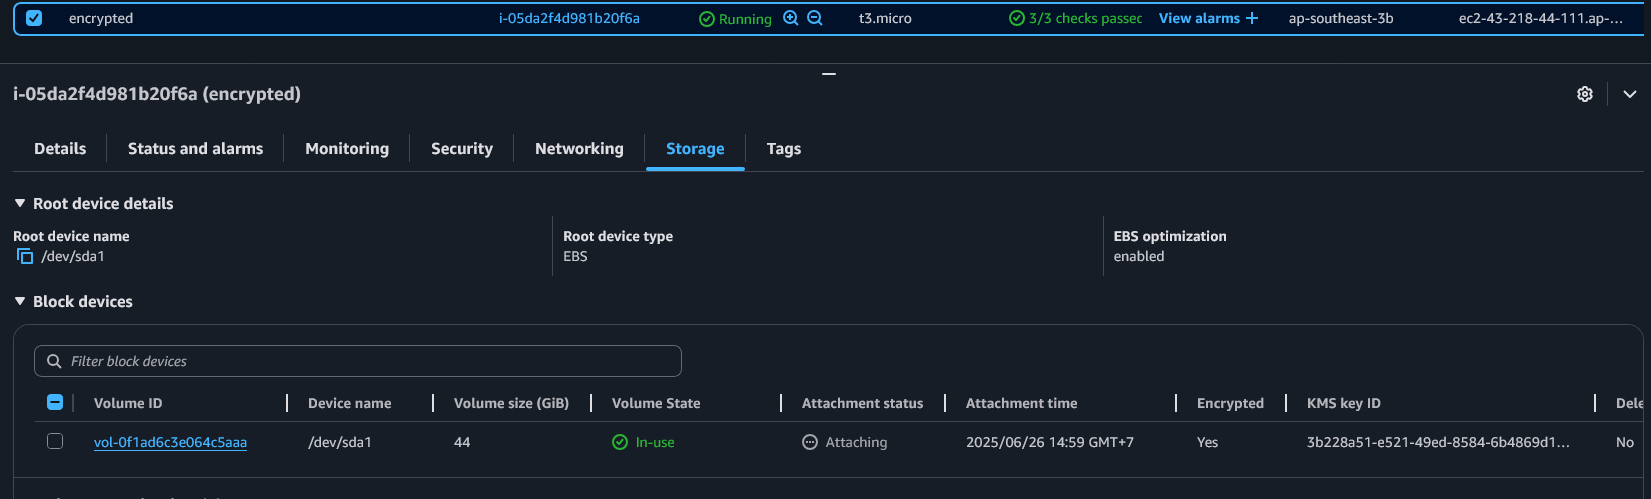
Identify the Target: In the AWS Management Console, navigate to the EC2 dashboard and select the instance whose root volume you want to resize.
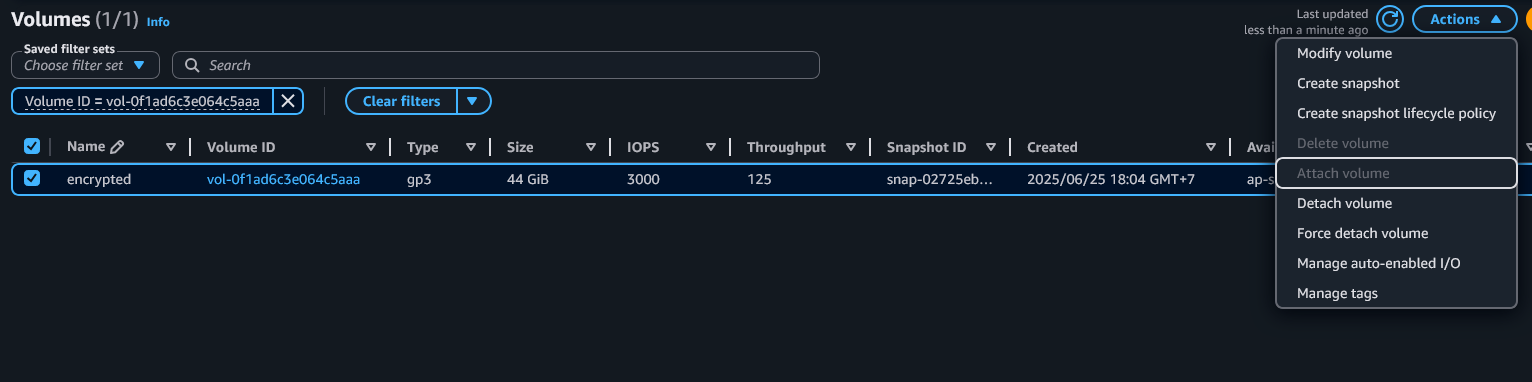
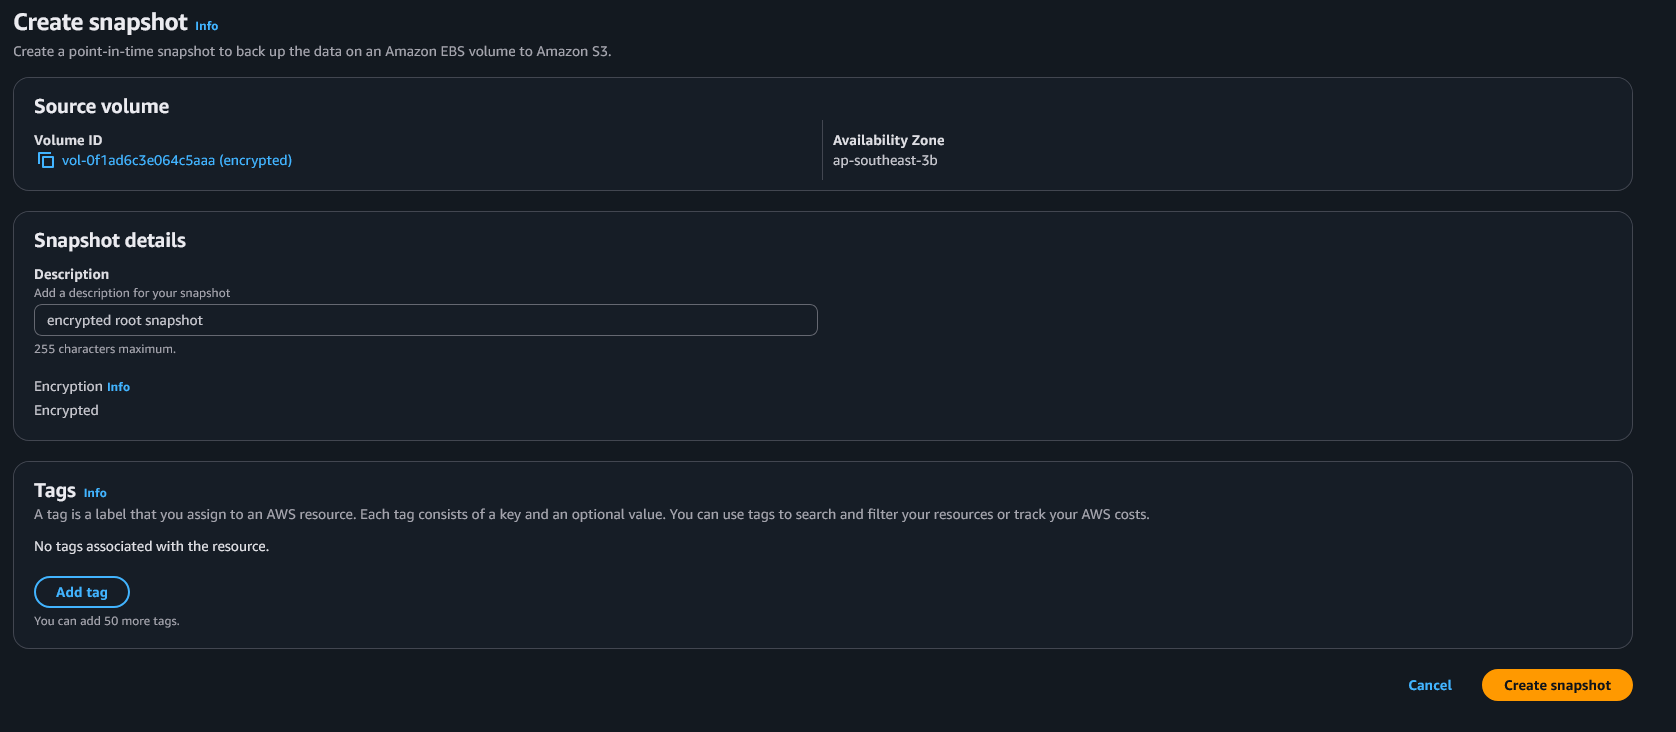
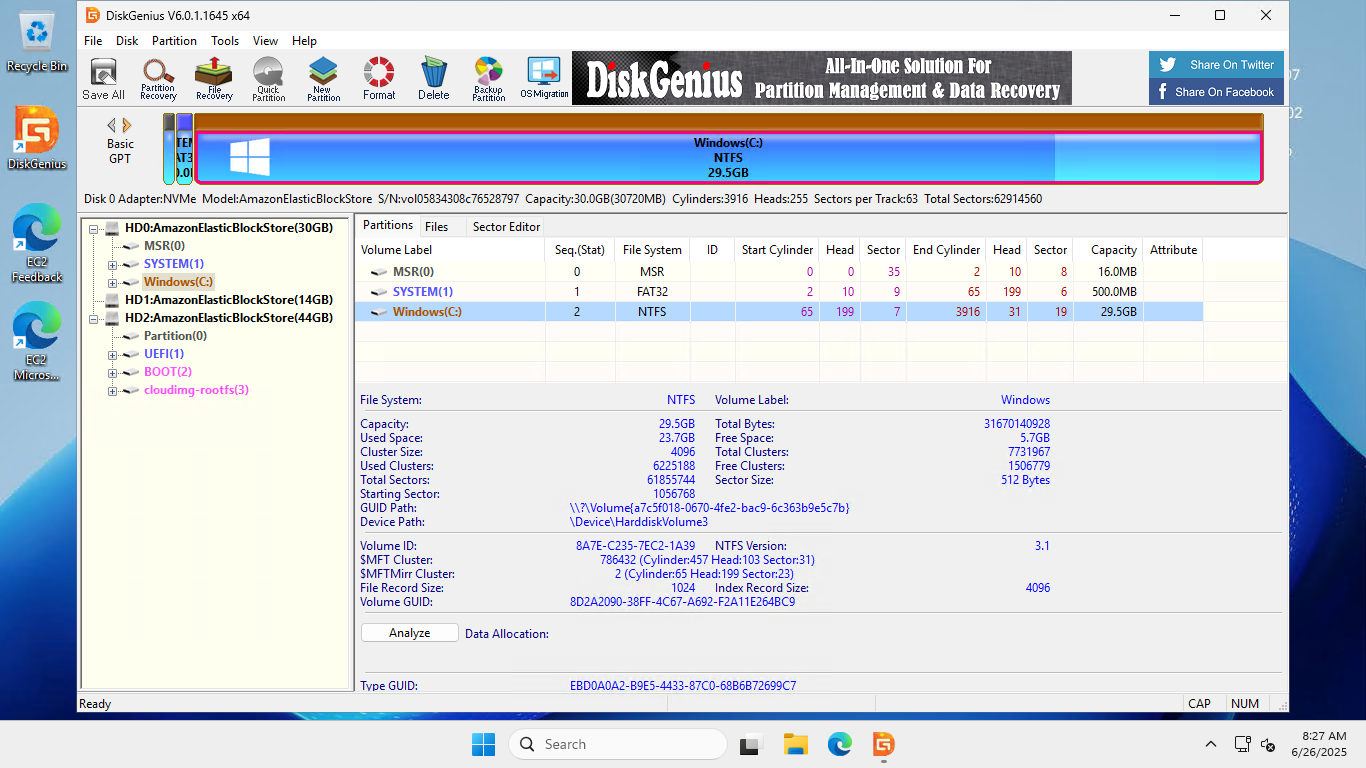
Take a Snapshot: In the instance details, go to the “Storage” tab. Click on the Volume ID of the root volume (usually /dev/sda1). In the Volumes screen, select the volume, click “Actions,” and then “Create snapshot.” Provide a descriptive name and create the snapshot.
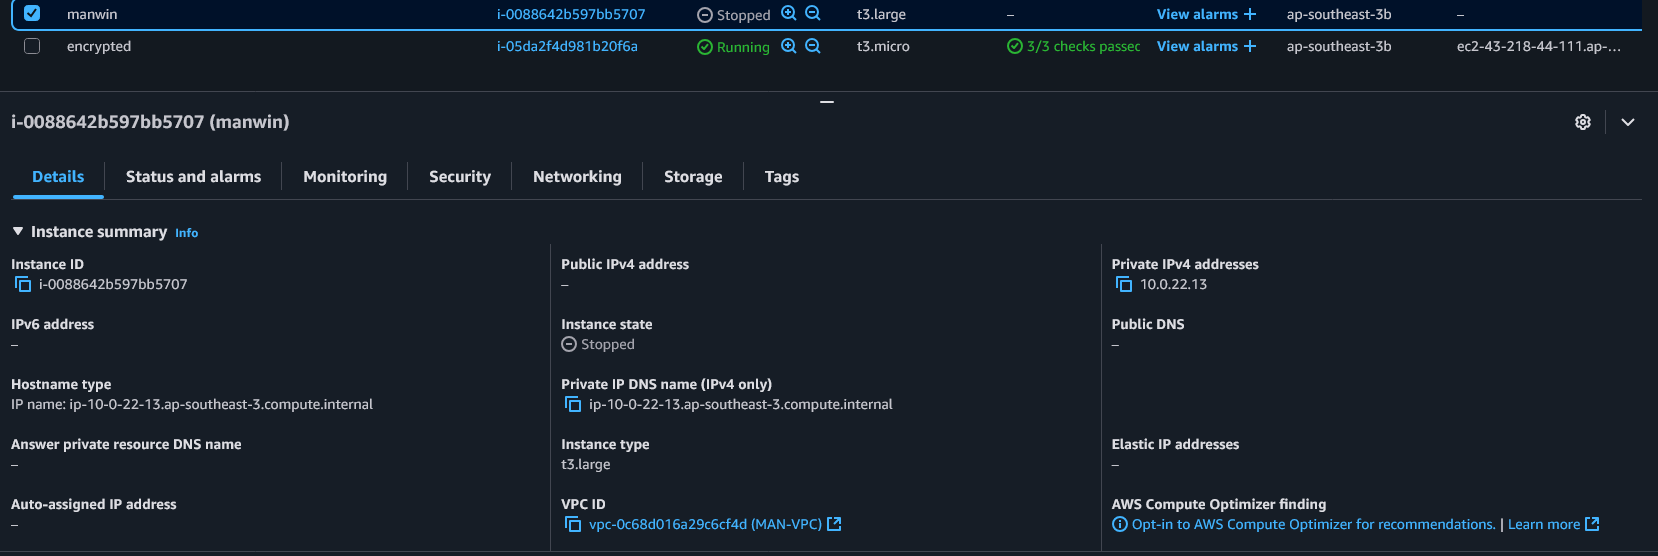
Stop the Instance: Once the snapshot is complete, stop the target EC2 instance.
Target Instance
create snapshot for target root ebs
Create and Configure a Helper EC2 Windows Instance
Launch a new EC2 instance in the same Availability Zone as your target instance. This will be our “helper” instance.
Once the helper instance is running, connect to it via Remote Desktop Protocol (RDP) / Fleet Manager. Download and install DiskGenius from its official website.
Create helper ec2
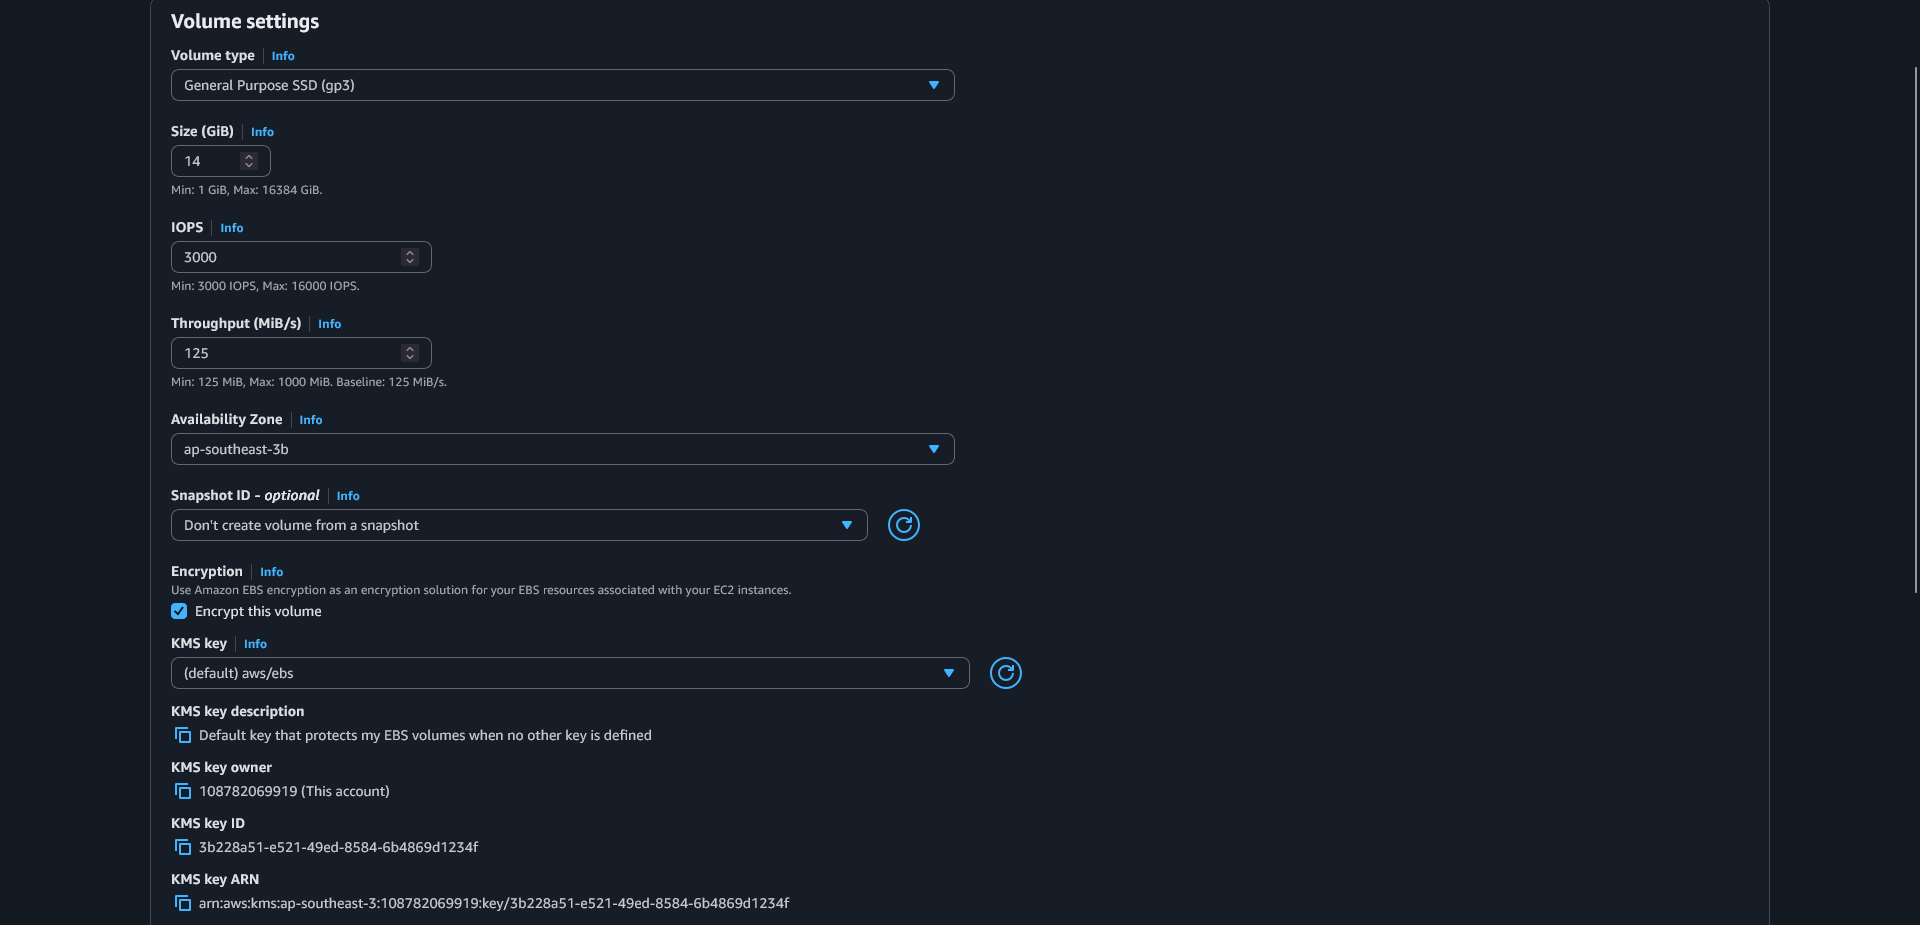
Create the New, Smaller EBS Volume
First, check real usage on the targer ec2, make sure we create new volume not lower than real usage

In the AWS Management Console, go to the “Volumes” section under “Elastic Block Store.”
Click “Create volume.” Configure the new volume with the desired smaller size. Ensure it is in the same Availability Zone as your instances.
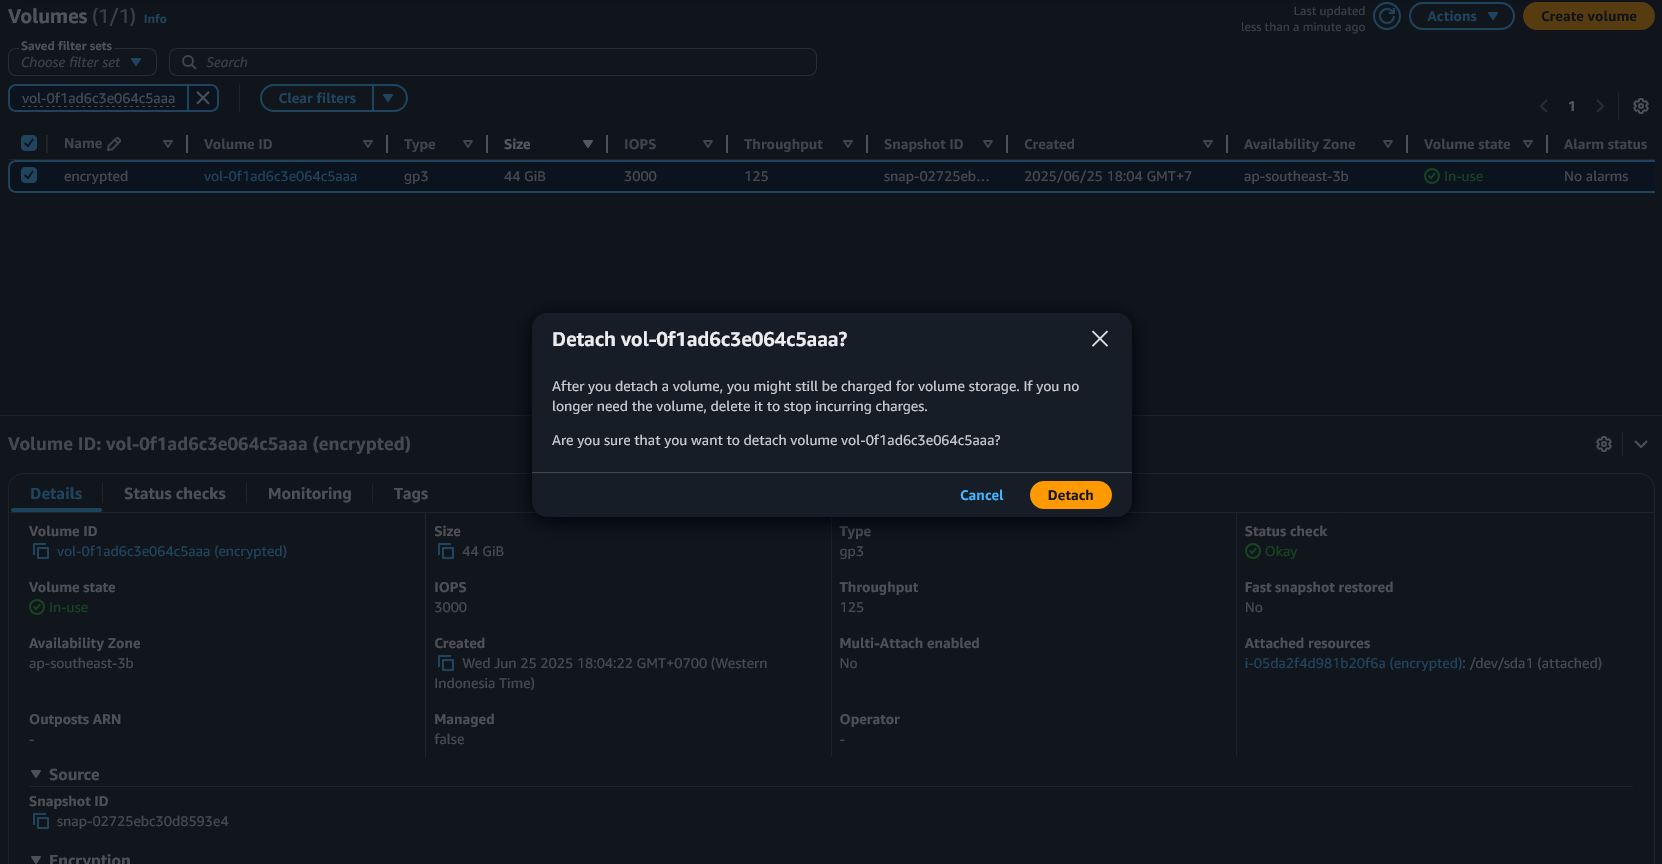
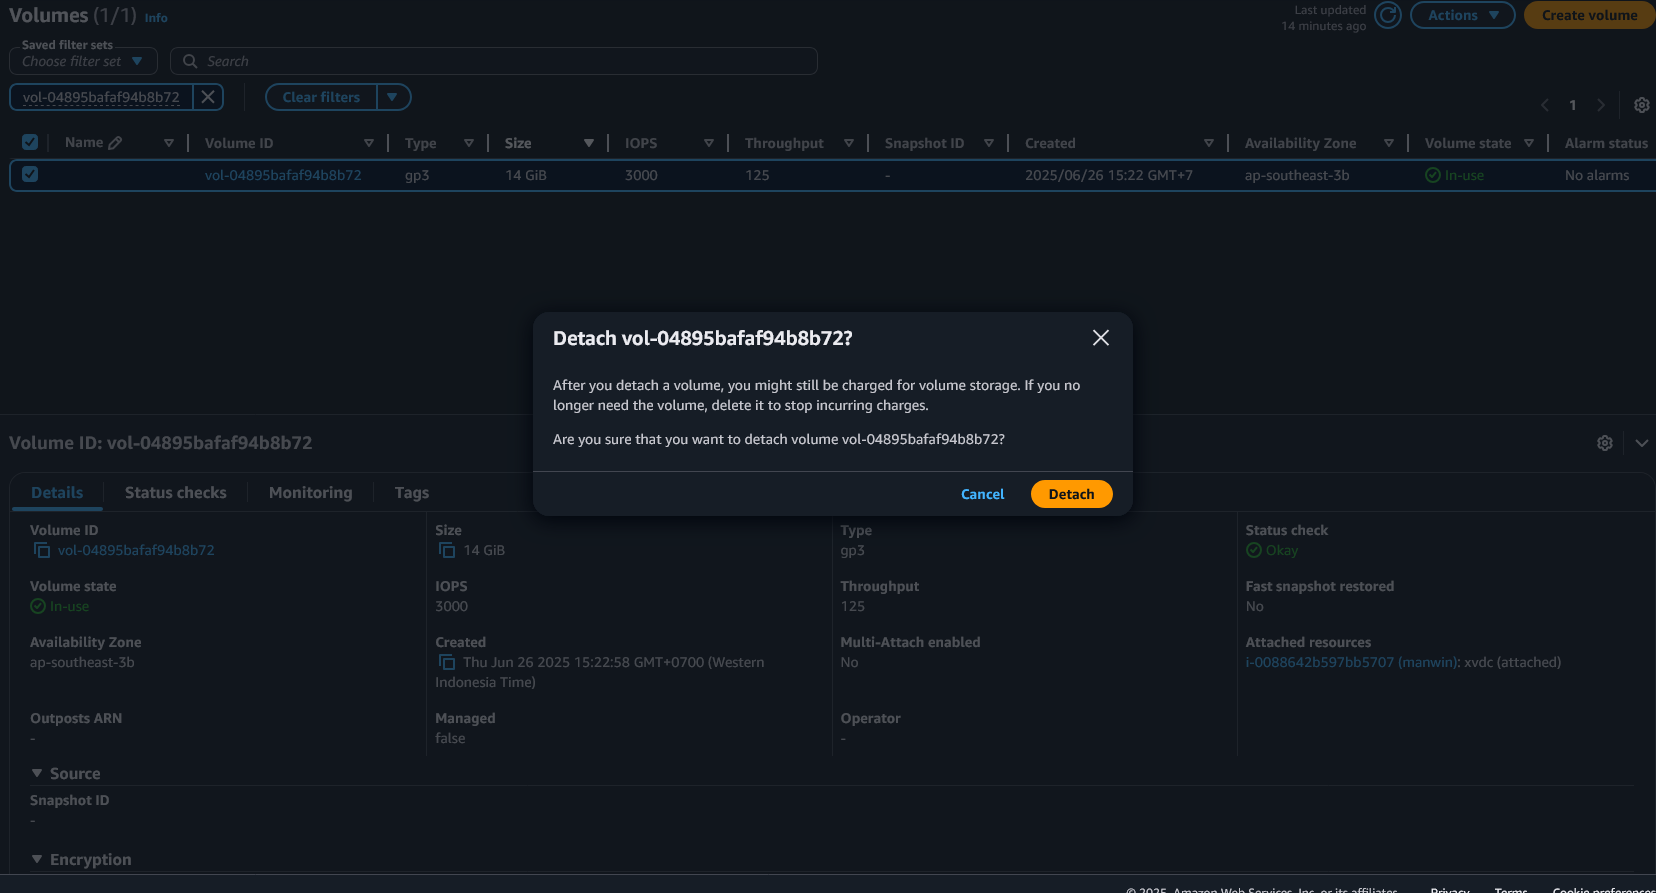
Detach the Target EC2 Disk
In the “Volumes” list, find the original, larger root volume of your target instance.
With the volume selected, click “Actions” and then “Detach volume.”
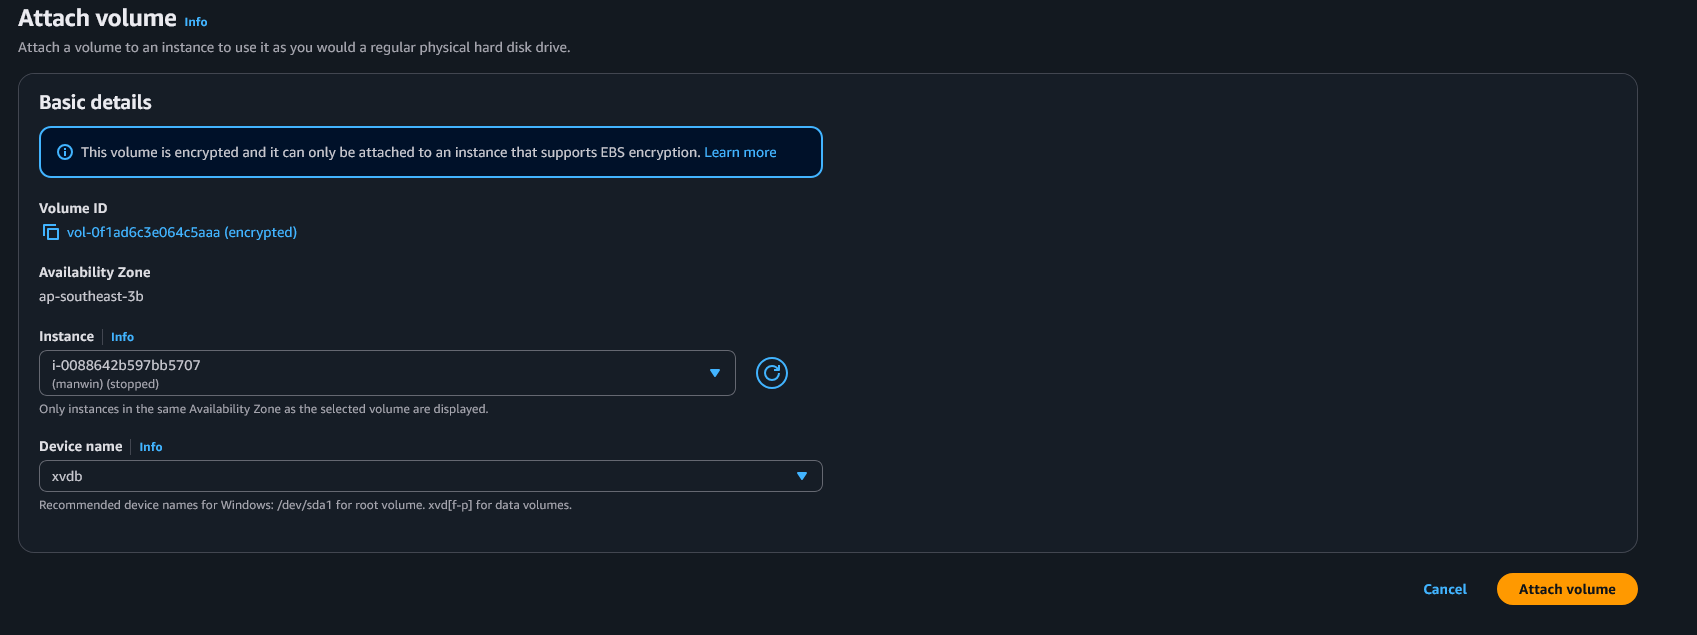
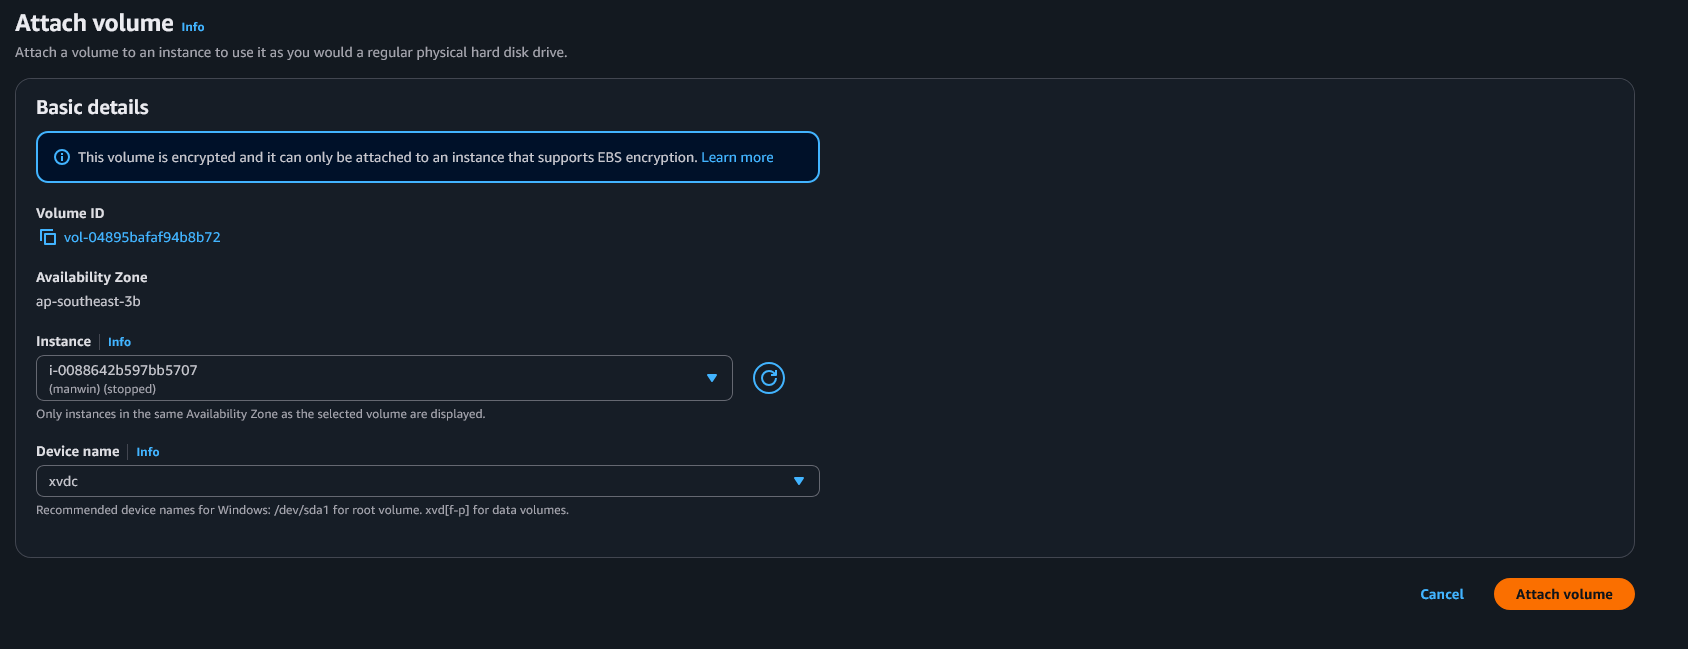
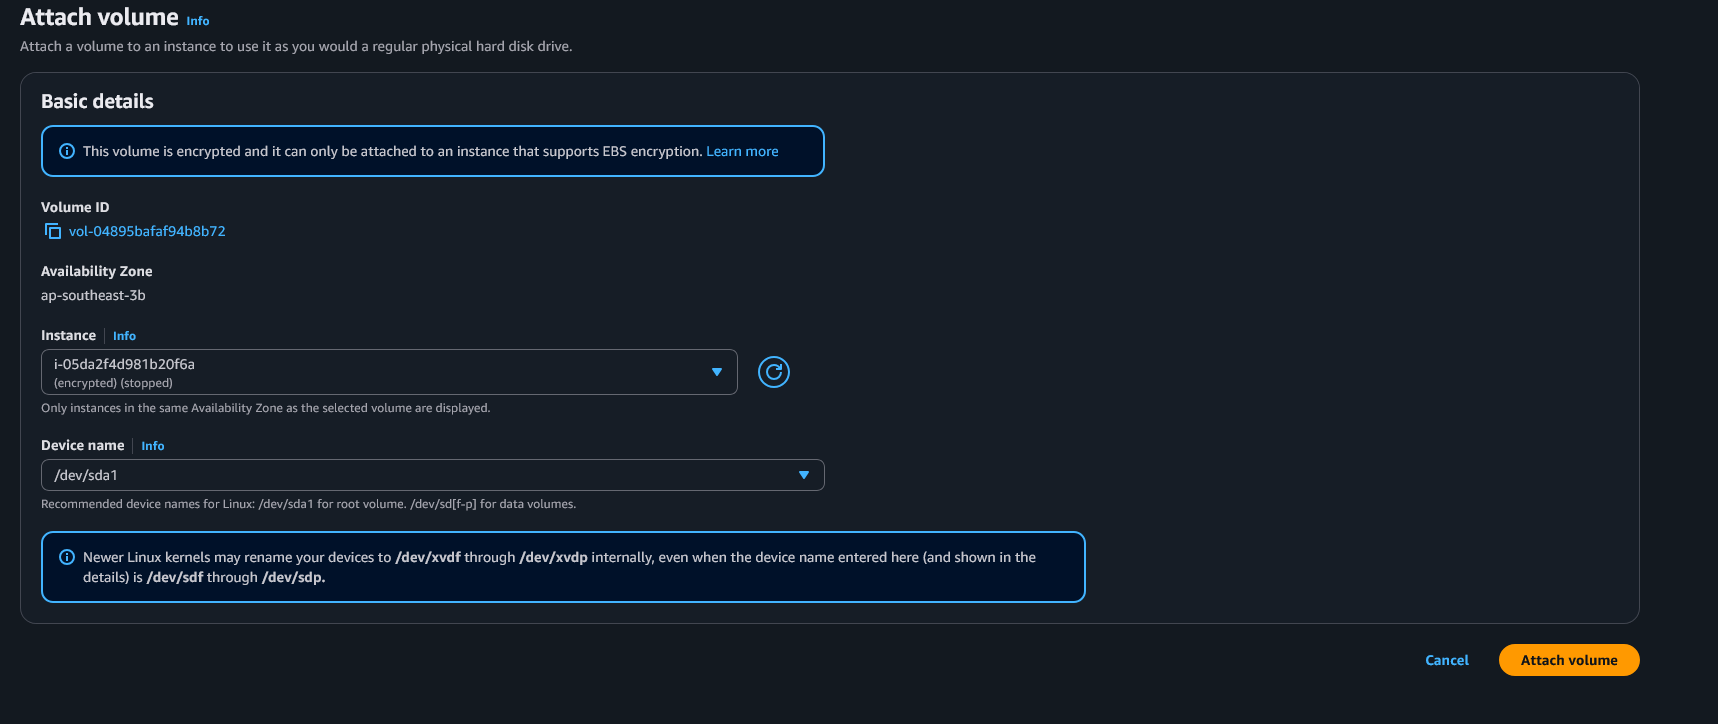
Attach Both Volumes to the Helper Instance
Select the original (now detached) volume, click “Actions,” and “Attach volume.” Select the helper instance and assign it a device name (e.g., /dev/xvdb).
Select the new, smaller volume you created. Click “Actions” and “Attach volume.” Attach it to the same helper instance with a different device name (e.g., /dev/xvdc).
Clone the Disk Using DiskGenius
Connect to Helper Instance, RDP / Fleet Manager into your helper instance.
Open the DiskGenius application.
Initiate Disk Clone:
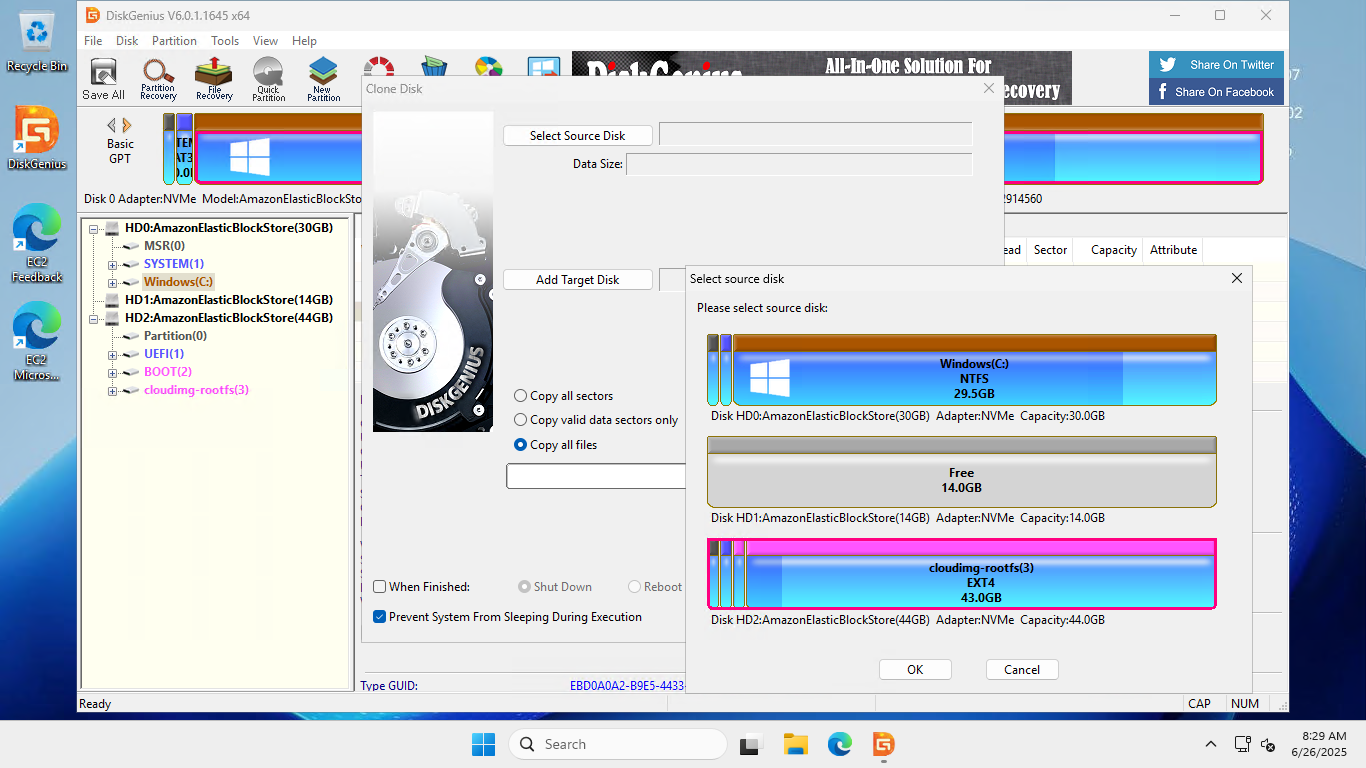
- In DiskGenius, go to the “Tools” menu and select “Clone Disk.”
- Select the source disk (the larger, original EBS volume).
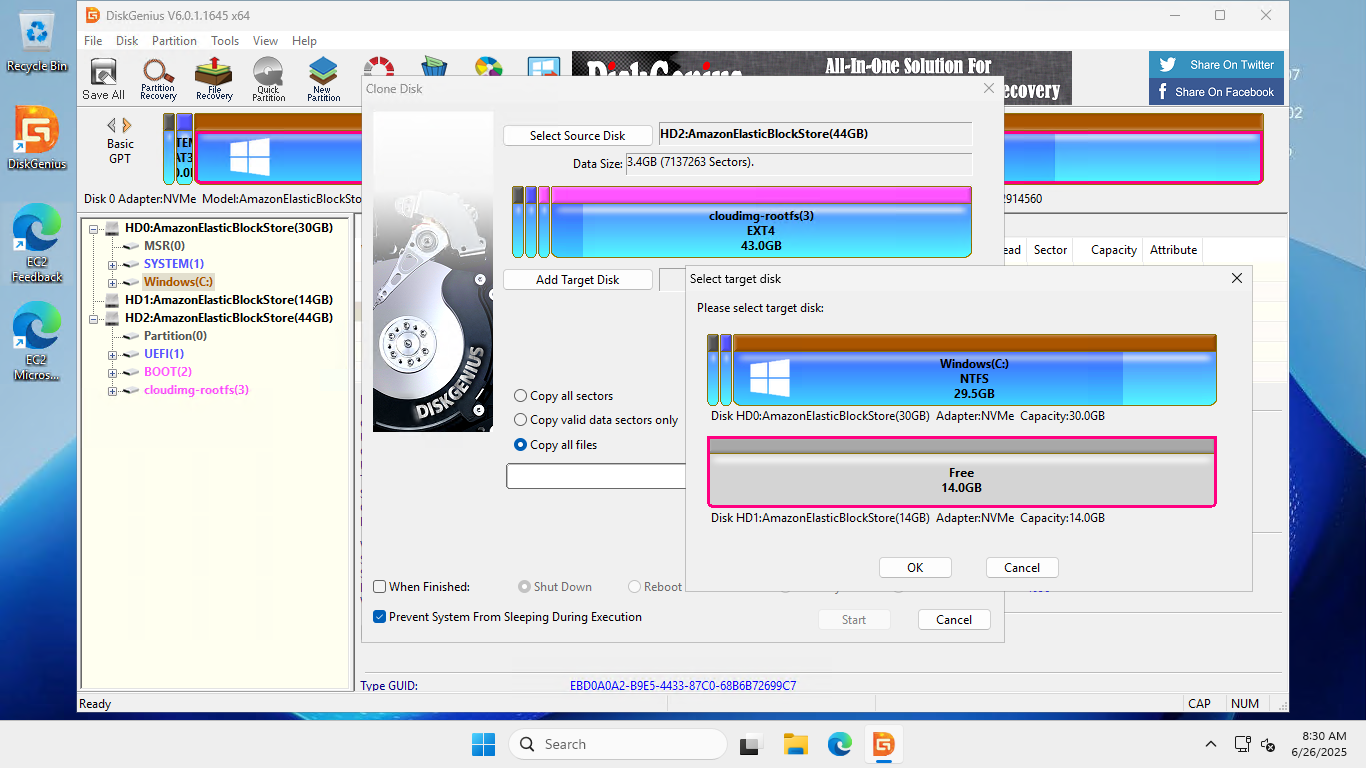
- Select the target disk (the new, smaller EBS volume).
- DiskGenius will automatically select the “Copy all files” method since the target is smaller than the source. This method copies the files and the file system structure.
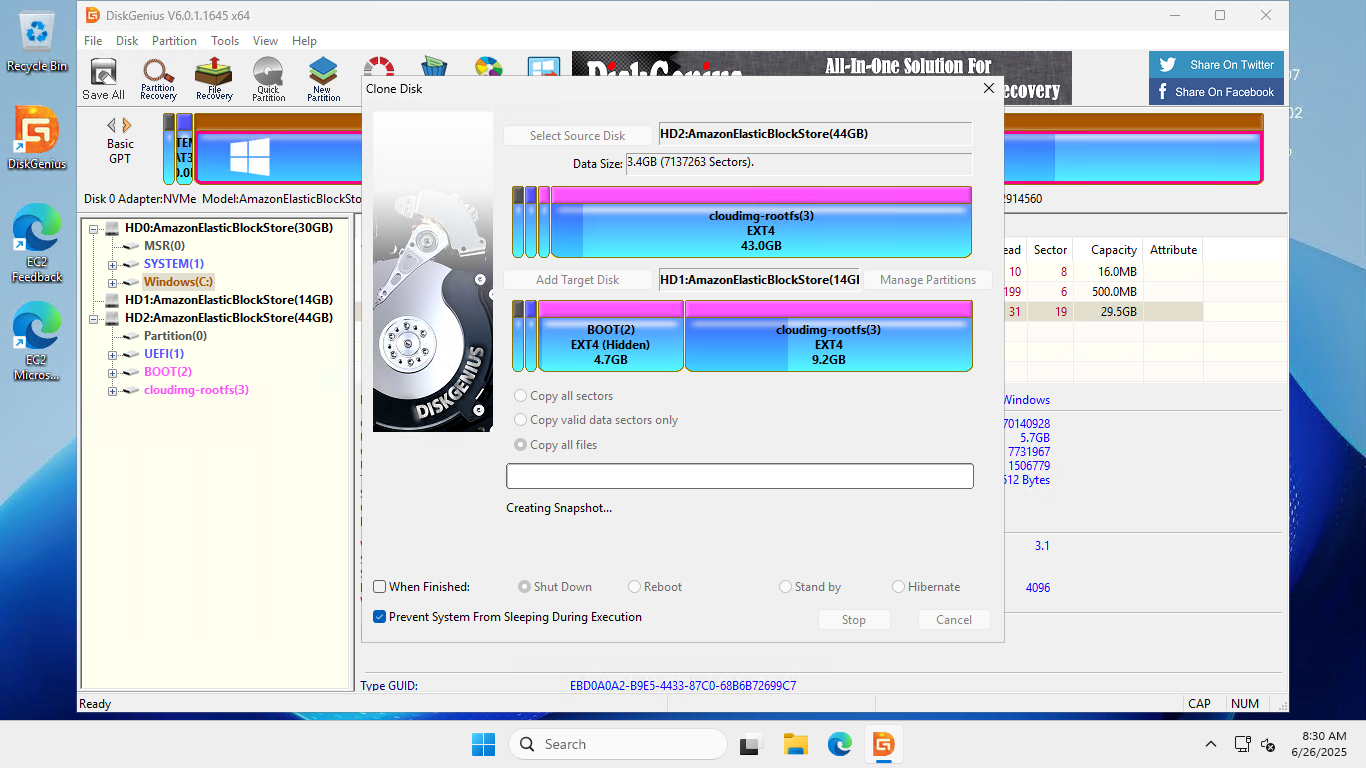
- You can adjust the partition sizes on the target disk if needed, but for a boot volume, it’s generally best to keep the structure as close to the original as possible.
- Start the Clone: Proceed with the cloning process. DiskGenius will warn you that all data on the target disk will be erased. Confirm and start the clone. The time this takes will depend on the amount of data.

Detach the New Volume and Attach it to the Target EC2
Once the clone is complete, go back to the AWS Management Console. Detach both the original and the new volumes from the helper instance.
Select the new, smaller (and now cloned) EBS volume. Click “Actions” and “Attach volume.”
In the “Attach volume” dialog, select your original target instance and, for the device name, enter /dev/sda1. This designates it as the root volume.
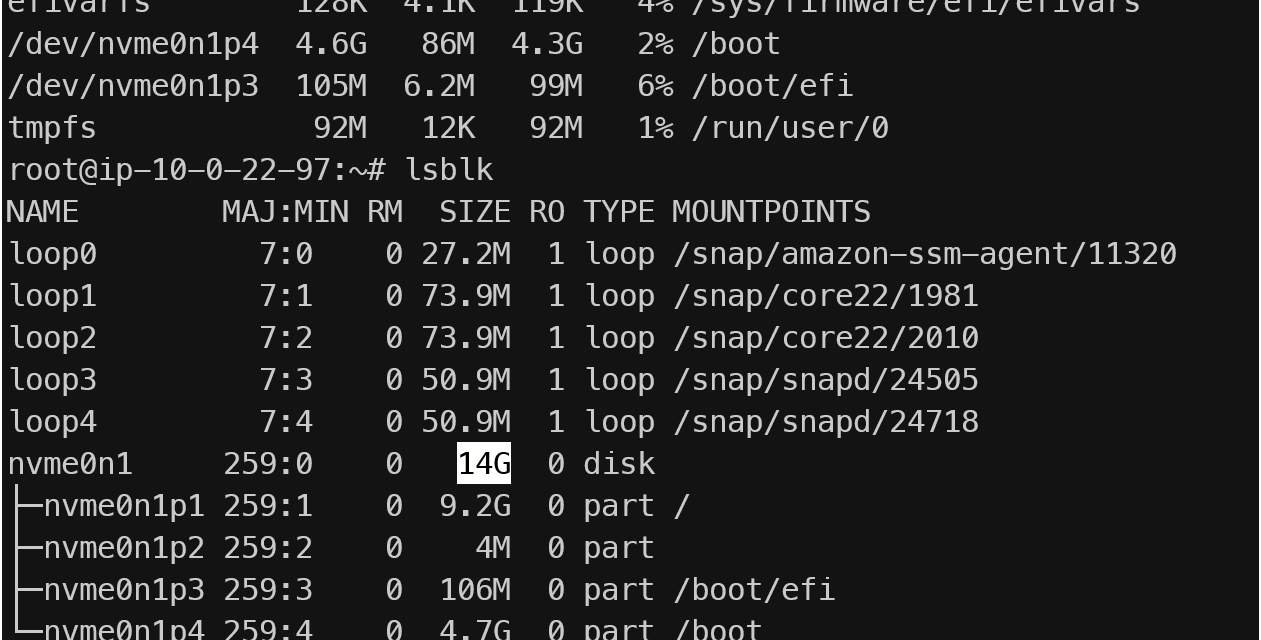
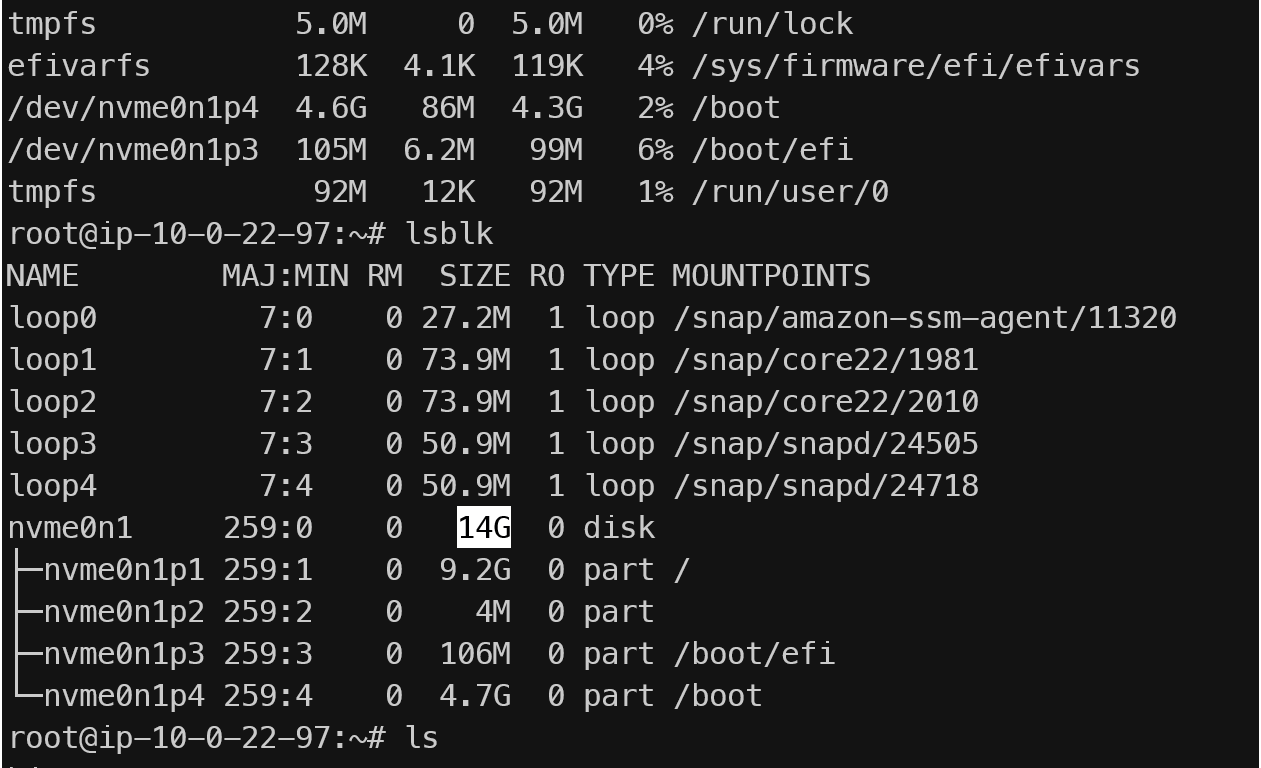
Start your original EC2 instance. and verify the disk…
Before shrinking the disk, i create hi.txt for make sure the file will be carried over
Thank you